 I know I promised some new paint colors, I will get to those soon. Right now, I am still working on those pesky walls! The sun room is still throwing me for a loop! I decided to test out a third pattern, which I think I like. On the other hand, it still leaves the wall wanting...something. Therefore, I have moved on to the living room where I will also demonstrate another technique for hanging wall art.
I have these amazing canvas pieces that I bought when I moved out of my parents house into my first apartment back in 2006. For those that knew me then, they are the three square canvases that hung behind the couch. I like them, because of the multiple layers of vibes I get from them. They are serene, but still impart a warm energy. They are elegant, but casual at the same time. They have that zen quality of balance, but without the sterile minimalism. They definitely go with my typical style, which I like to call Organic Elegance. Who wants to take a stab at defining that? Lol! They were a pretty amazing bargain, too! I believe they were $40 each, which is pretty cheap for this size (19.5" x 19.5"). Just go to Michaels, an empty picture frame this size typcially runs at least $50. At Bed, Bath, and Beyond (where I have found these same pieces as prints rather than canvas) or Target they would run about $60-$80. I won't even go there for how much something like this costs at Pier1!
Ok, so these pieces have been sitting on the floor all over my town home. I debated putting them them above the headboard in my bedroom, in the foyer above the side table, on the wall by the sliding back door to the yard, on the other side of the foyer as you enter the first floor, even broke them up and scattered them around. I should have just went with my original instinct. I bought them for a living room, just keep them in the darn living room! Really, this is what you get when you have stacks upon stacks of decorating magazines and watch HGTV nearly 24/7! Too many ideas that crowd out your instincts.
Yay, step one complete! I know what I am hanging on my wall. Time for step two: how am I going to hang these on my wall? That is actually easy this time. Since I only have three and do not want to spend a lot of money to find filler pieces. I am going to hang them horizontally like I did in my apartment.
So, my last post consisted of discussing how cutting out the shapes of the frames or artwork can help you visualize the finished arrangement before taking hammer and nail to your [painted] walls. I did that again here, but I have an added another step. When you want to hang things horizontally, you probably want them to be at the same height, right? I thought so. Well, after my experience in the sun room moving my paper mock-ups just a bit up, a little bit down, crap I went to far to the left, I came up with a pretty neat idea to help get that out of the way quicker. Actually, it is half my idea, half Better Home and Gardens.

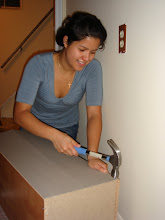
This is another one of those repeated advice articles, but it has always been aligned with the tricky task of hanging art or pictures in a stairway. Use string to make a grid to guide you. Brilliant! I bought a 200 ft roll of bright colored twine for only 97 cents at Lowes. Not bad! Worked amazingly. The trick is not only the string, but also the use of a level and a little assistance from more blue tape. Do not forget the level unless you want to keep stepping back to look, then back up the ladder to adjust (repeat until just right!).

0 comments:
Post a Comment